¶ The Interface
¶ Devices
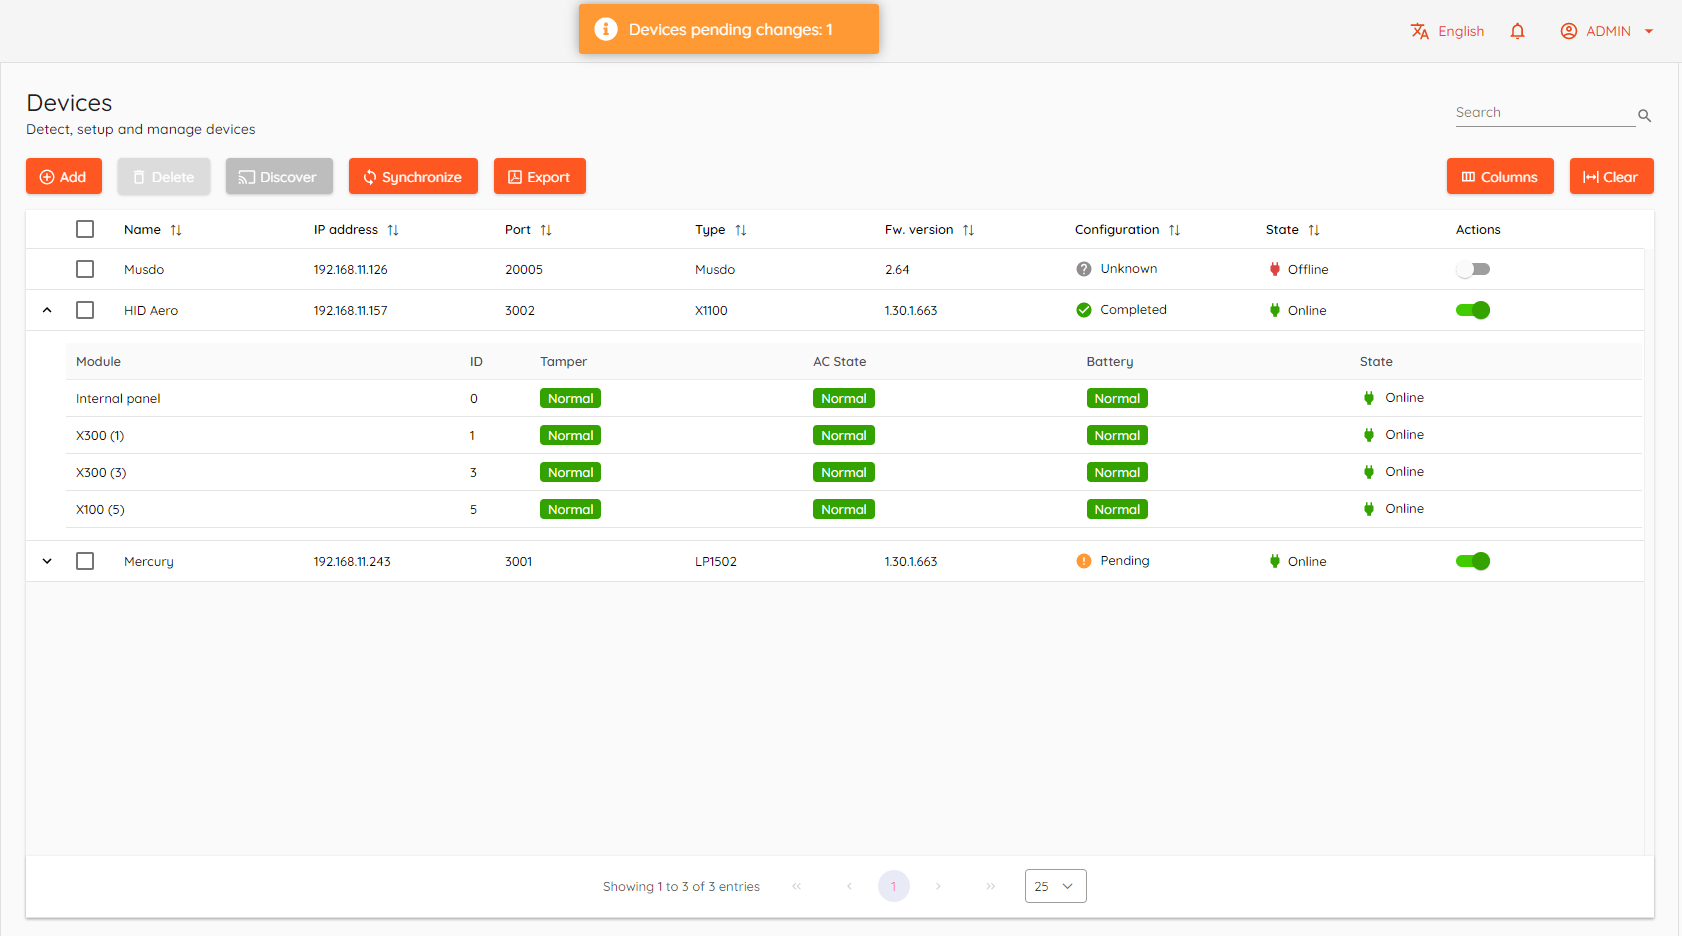
Every device connected with CredoID will be shown in this section. Each device whether it's a controller like Mercury LP1502 or software integration like DigiFort has to be configured beforehand to be discoverable by CredoID.

¶ Add & Discover
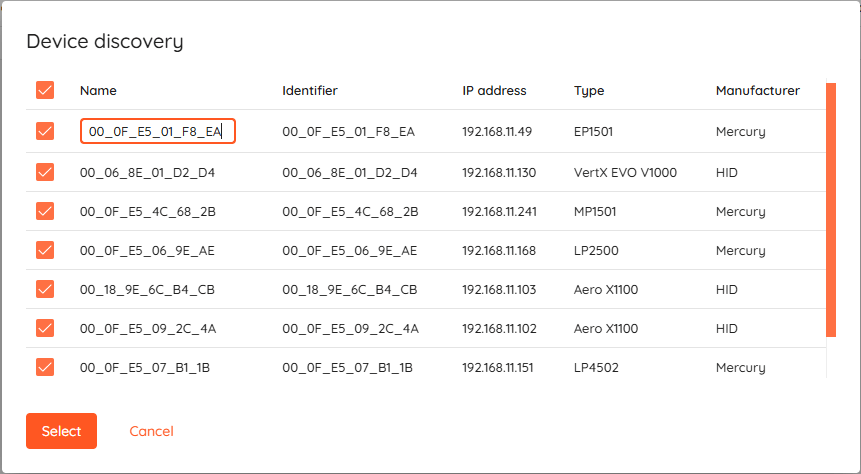
Access control devices can be added using Discover function or manually from the list by pressing Add.
Below you can find link to each device configuration, necessary to establish connection between:
- How to add HID Aero X1100 controller
- How to add Mercury EP, LP, MP series controllers
- How to add HID VertX series controllers
- How to add DigiFort VMS
- How to add ASB Musdo Security panel
- How to add CredoID Mobile reader
- How to add Suprema CoreStation
- How to add Aperio IP Hub
- How to add Azure controller
- How to add TANlock 3 device
- How to add TANlock 3 Fingerprint device
- How to add Generic LPR camera (Axis)
- How to add NX Witness server
- How to add Honeywell controllers
- How to add Siram OCR
- How to add XPass 2
¶ Adding multiple devices
With the release of CredoID 4.19.x multiple devices from the discovery list can be added all at once.
¶ Controller replacement (HID Aero & Mercury only)
This feature allows you to replace an existing controller without losing configuration. The settings, modules and doors from the old controller will be transferred to the new one automatically.
¶ Steps to Replace a Controller
Select replaceable controller - In the controller list, look for the one marked with a replacement icon  . This indicates it's eligible for replacement. Click to open device replacement window.

Select new controller - Make sure the new controller is connected and discovered. If it is, it will appear in the list. Select it as the replacement.

Confirm the Replacement - Click the "Replace" button to begin the process. The system will transfer all configurations from the old controller to the new one.
This is a non-destructive process — no settings are lost during replacement.
¶ Device time zones
Individual time zone feature for each device.
Every device is using "System time zone" by default.
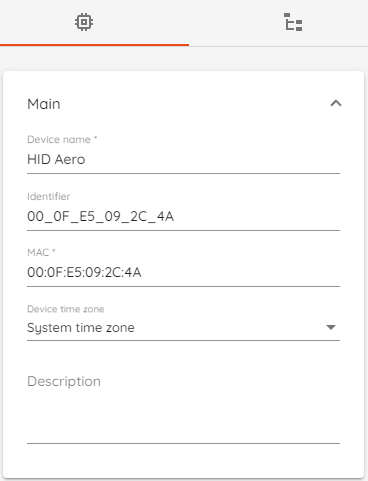
Steps to change device time zone:
- Navigate to "Hardware -> Devices".
- Open device menu by selecting your device.
- Select any time zone from the list and click "Save".
- Synchronize your device.
¶ OSDP Auto detect
To enable "Auto detect" go to your device list and select either HID Aero or Mercury device, open "Device modules" tab and expand "Internal panel" section.
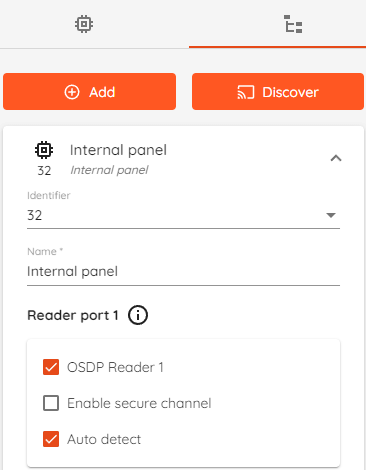
Enabling "Auto detect" automatically detects and resets OSDP readers address to 0 and baud rate to 9600 during synchronization.
Auto detection works with one OSDP reader per port and only with HID Aero and Mercury controllers.
Auto detection is not supported on modules and older generation readers (e.g. iCLASS SE R10).
¶ Synchronize
CredoID checks configuration of each device and gives the following states:
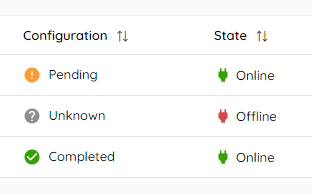
Online- Device sucessfully connected with CredoID and can be seen.Offline- Device can't be reached.Unknown- Device configuration is unknown mainly when device is offline.Pending- Device configuration differs from CredoID.Uploading- This status appears when you Synchronize device meaning that current CredoID configuration is being sent to device.Completed- Device has been synchronized succesfully.Sync error- There was an error or misconfiguration in the device.
¶ Before synchronization rework (Pre 4.13.0)
Any changes made in CredoID have to be synchronized with device. I.e. if you add/modify/delete door, module, schedule, you will get notification with Devices pending changes:

If you click on this snackbar notification, you will get two options:
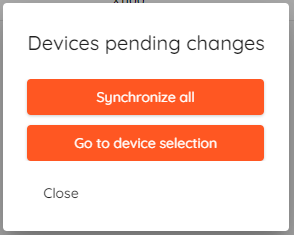
- Synchronize all - will synchronize every device with
Pendingstate. - Go to device selection - opens Devices tab and allows you to synchronize manually one by one.
It is necessary to synchronize device each time you make changes in CredoID with a few exceptions. Adding/modifying/deleting Access Levels and Users including credentials will not require sync.
Depending on the controller they will take some time to download configuration and after will reboot. I.e. HID VertX would take about 15s for full reboot cycle and HID Aero might take up to 50s. That can cause disruptions so plan your changes accordingly.
¶ After synchronization rework (4.13.0 onwards)
Starting with version 4.13.0 „CredoID“ has live synchronization with HID Aero and Mercury controllers.
Live synchronization means you can make changes in „CredoID“ and it will upload data to your device without needing to synchronize it every time, though with a few exceptions - deleting doors, inputs, outputs, schedules, changing device module settings, pin code length, managing access areas still require synchronization.
¶ Firmware Updates
Firmware updates is a new feature introduced in „CredoID“ v4.13.0 which allows you to bulk update your devices straight from „CredoID“ UI.
Currently only HID Aero X1100 and Mercury EP, LP, MP series (including modules) are supported.
"CredoID" setup does not come with the newest firmware files embedded since version 4.17. Firmware package can be downloaded here and it should be extracted to "C:\Program Files\Midpoint-Security\CredoID\Service\devices\Firmwares"
To update firmware:
- Go to "Hardware -> Devices" - click "Update" button above device list.
- Click "Upload" to upload required firmware files.
- Select devices or modules that you want to update.
- Click "Update"
Modules cannot be updated while devices are updating and vice versa.
Updating firmware usually takes up to 15 minutes. Major updates can take longer.
Before updating to 2.x make sure your controller it at least on v1.31.x FW, otherwise update to v1.31.x first.
All devices that are eligible for an update will have a yellow update icon adjacent to the firmware version in the firmware column.

Clicking "Update" button or update icon  will open "Firmware update" menu.
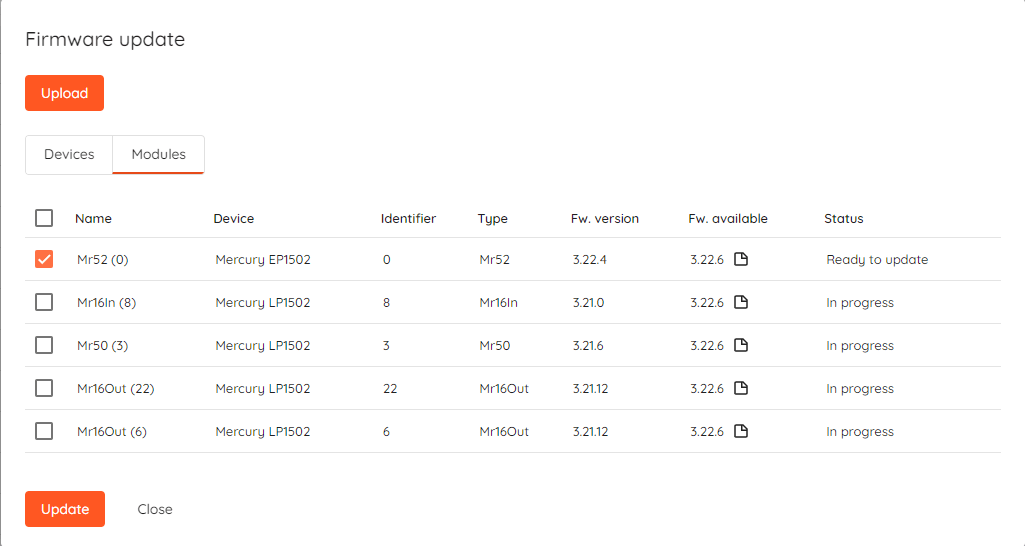
- Upload - Upload firmware files.
- Devices - Shows list of devices that are eligible for update.
- Modules - Shows list of device modules that are eligible for update.
- Update - Starts update process for selected devices or modules.
- Close - Closes firmware update window.
 - Firmware release notes.
¶ Detailed module view
Devices with connected modules are show in expandable row. Click an arrow to expand.

You can see the Module name and ID and main inputs states such as Tamper, AC and Battery.
Failed- The input circuit is "open" and you should check it right away.Normal- The input ciruit is properly closed and there are no alarms.Online- The communication between device and module is online.Offline- The communication between device and module is down.
¶ Export
You can export device list to a PDF file. To do that you simply press Export button.
¶ Actions
You can quickly enable or disable device from communicating with CredoID using Actions column in device list.
