HID Aero or Mercury controller with firmware version 2.0+ needs to generate a new sertificate through controllers' web UI for Aperio IP Hub to communicate with the controller.
¶ Aperio IP Hub configuration
In this section we will cover how to configure Aperio IP Hub and use it with CredoID.
¶ Aperio System Overview
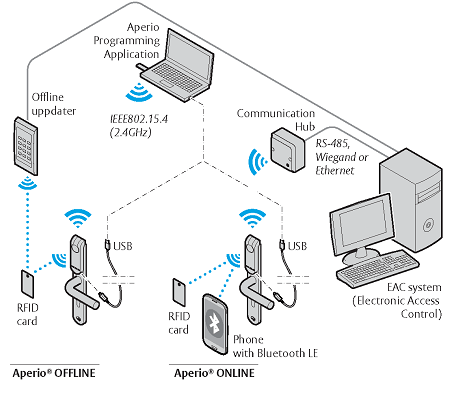
¶ The Aperio System
The Aperio system is used in the following way: The user holds an RFID credential in front of an online or offline lock.
- Aperio Online System: An online lock sends card credentials wirelessly to the communication hub which in turn communicates with an EAC (Electronic Access Control) system (wired through RS-485, Wiegand or TCP/IP). The EAC system makes the access decision. The decision is sent via the communication hub to the lock and access is granted or denied.
- Aperio Offline System: Access decision is made locally by the lock. Result of decision depends on access rights stored on the card and also on lock configuration transferred from the EAC through offline updaters with setup- or user cards.
¶ The Aperio programming application
The Aperio programming application is used for the configuration of a door installation. It is normally installed on a laptop and is used with an Aperio USB radio dongle connected to one of the USB ports. The Aperio programming application uses the USB radio dongle to connect to a communication hub and an online lock (via the communication hub) or directly to an offline lock. V3 locks also supports a USB cable connection.
¶ Configuring ACU/Aperio IP
Before using CredoID to connect to Aperio IP Hub - IP address has to be configured correctly.
In Aperio programming application:
- Scan for devices, add your Communication Hub when found.
- Right click on your HUB, navigate to "Configure..."

- Click next until you advance to "Network and ACU Settings" section, click "Change...". Here you should set IP address of your Access Control Unit (HID Aero or Mercury) with port for Aperio (9999 is default). TLS must be enabled. Click ok and advance.

- Set your Aperio device IP address - Right click on your HUB, navigate to "Communication Hub -> Change IP Address".

Make sure your Aperio device and ACU is on the same subnet.
Use Aperio programming application to configure your Aperio device.
Aperio programming application has instructions on how to set it up in "Help" section.
¶ Aperio with CredoID
This section explains how to set up Aperio with CredoID.
Aperio currently works with TLS on Mercury and HID Aero devices in CredoID.
¶ Enabling Aperio IP Hub support
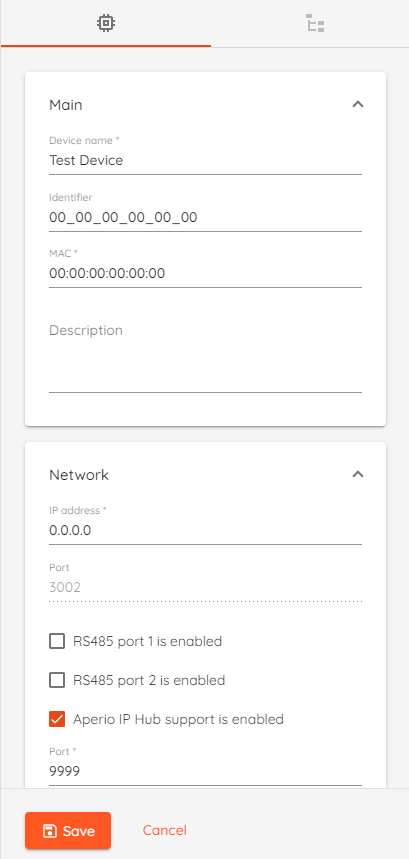
To Enable Aperio IP Hub support - select any HID Aero or Mercury device from your device list, scroll down to "Network" section and check mark "Aperio IP Hub support" by clicking on it. Also, set the port number to the one you configured in Aperio programming application and then click "Save".
¶ Adding device modules
Now that Aperio IP Hub support is enabled you can add Aperio IP Hub as a module for your device.
- Navigate to "Hardware" -> "Devices" tab and click on configured device.
- Click on "Device Modules" tab.
- Click "Add" button.

- Enter your module name and select module type "Aperio IP Hub" from the list, click "Accept".
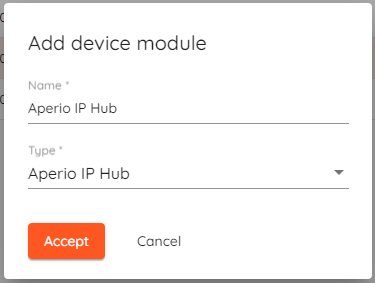
- Select "Identifier", enter name and IP address.
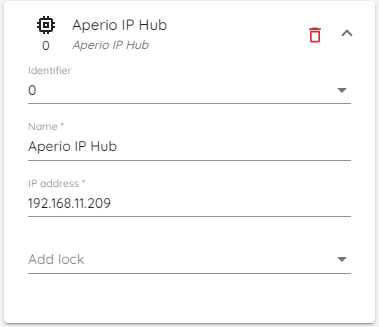
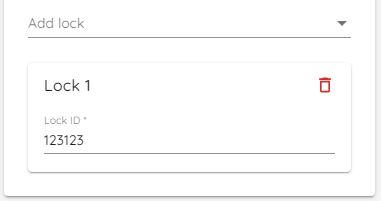
- Click "Add lock", select lock number and enter Lock ID (repeat this step if you have more locks).
- Click "Save" button.
¶ Configuring doors
For locks to work, they have to be assigned to doors.
- Navigate to "Access points" -> "Doors".
- Click "Add", enter device name, navigate to "Entry reader" section.
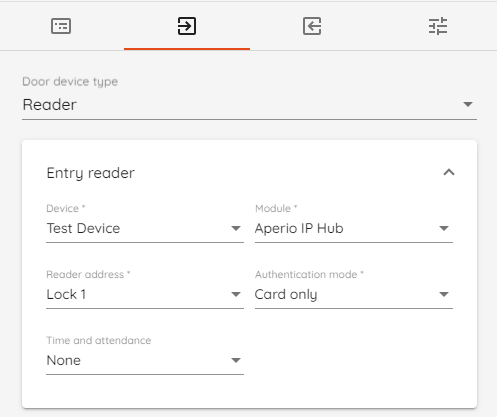
- Select "Reader" as "Door device type".
- Select device that your Aperio IP Hub is connected to, then select Aperio IP Hub module.
- In "Reader address" field select a lock that you have previously configured.
- Select default authentication mode.
- You can designate lock/reader as "Clock in" or "Clock out" device by clicking on "Time and attendance" field. (Optional)
- Click "Save" and synchronize your device.