¶ ASB Musdo Configuration
This section covers ASB Musdo configuration with CredoID only, before using the devices, it must be configured with ASB Securities provided tools.
¶ Adding the device
After ASB Musdo device has been configured, it can be added and used with CredoID.
- Navigate to "Hardware" -> "Devices" tab.

- Click "Add" button.
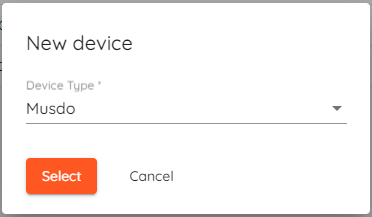
- Select "Musdo"from the list and click "Select".
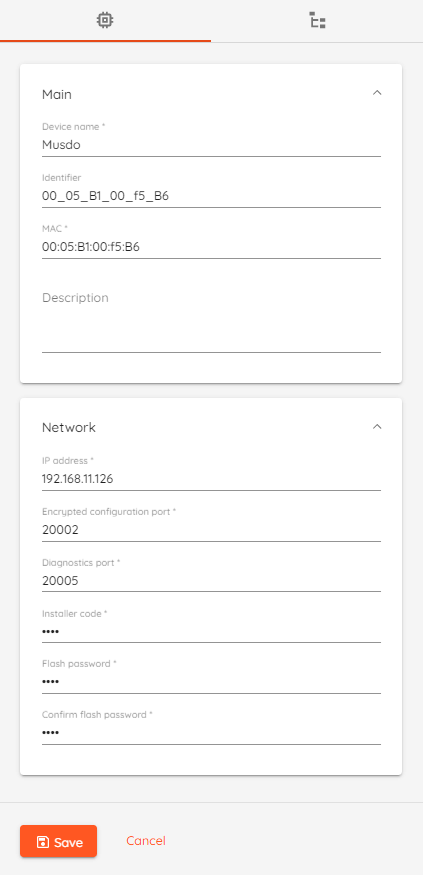
- Device Name: Type unique name for device.
- Identifier: Device identifier, generated by CredoID.
- MAC: Type device MAC address.
- Description: Optional field to describe the device.
- IP address: Type device IP address.
- Encrypted configuration port: Default value 20002.
- Diagnostics port: Default value 20005.
- Installer code: Type installer code, which is set using ASB Securities provided tools.
- Flash password: Type flash password, which is set using ASB Securities provided tools.
- Confirm flash password: Repeat flash password.
- Click "Save" button.
After saving the device, if device status should change to "Online" after few moments. - Click Synchronize button and wait until device Configuration state is "Completed".
After synchronization modules, inputs and groups will be added automatically to CredoID.
¶ Groups
This sections covers ASB area actions, which can be performed using CredoID.
- ARM: arms areas, if all inputs assigned to that area are in secure state or bypassed.
- DISARM: disarms the area regardless of area state.
| Area state | Description |
|---|---|
| Disarmed | Area is disarmed. Alarms are ignored. |
| Armed | Area is armed and in secure mode. |
| Exiting Area | Area is in exiting state. During exit period alarms are ignored. |
| Alarm | Area alarm state, triggered by input |
Maximum number of areas we can define on a panel:
Each control panel has its own Mbus (RS485).
It’s not possible to combine the RS485 interface of 2 control panels.
