¶ HID Aero Configuration
In this section we will cover how to configure HID Aero device and use it with CredoID.
¶ Setting the jumpers
- If attached, unscrew the four corner casing screws.
- Remove the X1100 casing to access the battery jumper and the end of line termination jumpers.
- Set the battery jumper J4 to ON.
- Set IO Module Port 1 and 2 end of line termination jumpers J5 and J9 to IN, only if the X1100 will be the end of communication bus.
- Replace the casing and secure with the supplied four corner casing screws.
The static RAM and the real time clock are backed up by a lithium battery when input power is removed. This battery should be replaced annually.
¶ Connecting to device
- Connect an ethernet cable to the device and enable factory default settings, by turning DIP switch 2 to ON. This will enable factory default communication parameters.
- Network: static IP address: 192.168.0.251
- Subnet Mask: 255.255.0.0
- Default Gateway: 192.168.0.1
- DNS Server: 192.168.0.1
- Set DIP switch 1 to ON. This will enable default user name admin and password password.
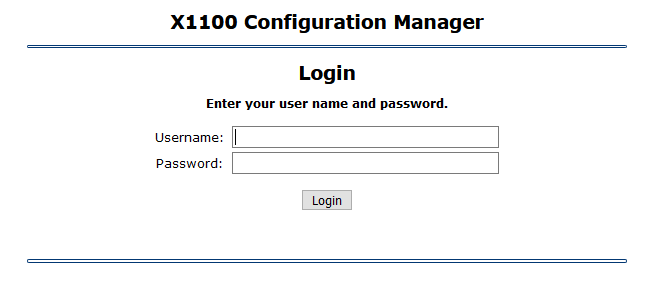
- Open a web browser and connect to device over default IP address: http://192.168.0.251
¶ Creating a web user
Create an optional web interface user if you want to change device settings later.
- Navigate to "Users" tab.
- Click "New User" button.
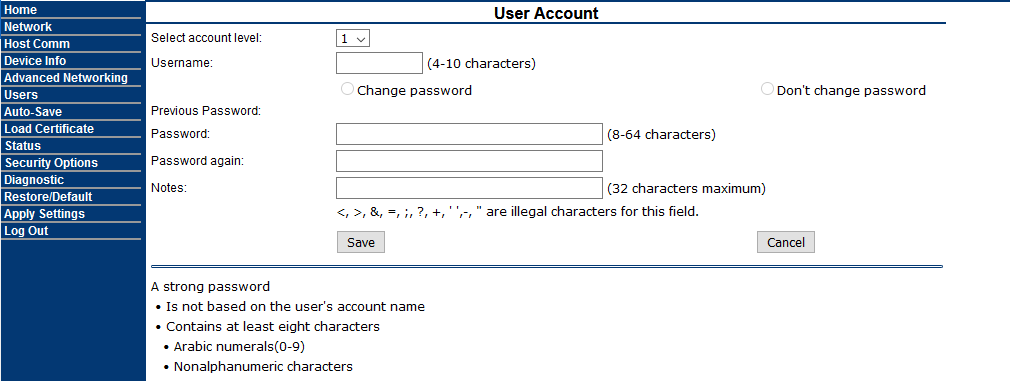
- Account level: Select "1" for administrator level.
- Username: enter username, do not use 'admin'.
- Password: create a strong password.
- Click "Save".
¶ Configuring Network settings
 ## Configuring Network settings
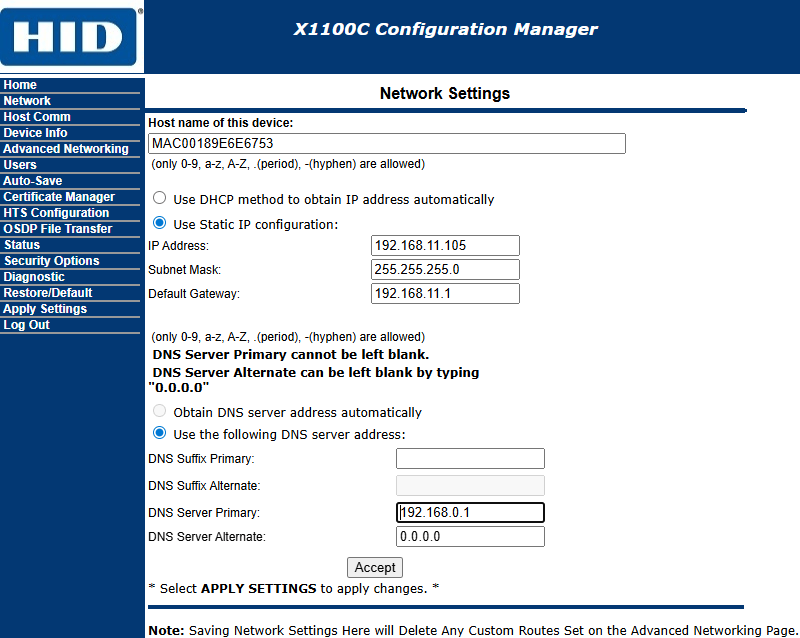
- Navigate to "Network" tab.
In the IP Settings section, configure the following:
- IP Address: Assign a static IP address to the device.
- Subnet Mask: Enter the appropriate subnet mask.
- Default Gateway: Set the gateway address for the network.
- Click "Accept".
Ensure the device is on the same subnet as the system running the CredoID service.
¶ Setting host communication
- Navigate to "Host Comm" tab.
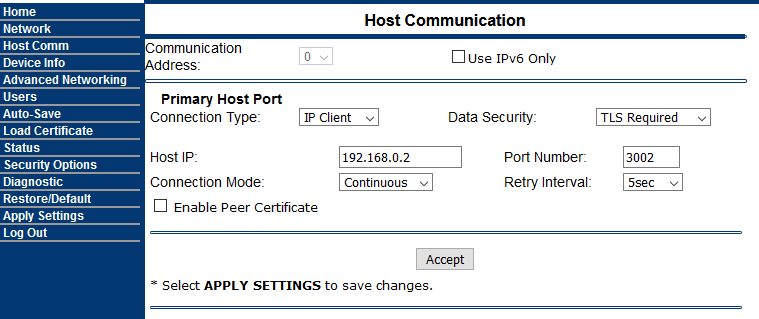
- Fill in required fields:
- Connection Type: IP Client
- Data Security: TLS Required
- Host IP: Enter IP address where CredoID is running.
- Connection Mode: Continuous
- Port Number: 3002
- Click "Accept".
¶ Applying configuration
- Double check your configuration.
- Set all DIP switches to OFF position.
- Click "Apply Settings" on the left menu. Device will reboot.
Now you can add device in CredoID which will appear in "Discover" list.
Make sure there is an incoming connection exception in your firewall settings for port 3002.
¶ HID Aero With CredoID
This section explains how to setup device with CredoID.
¶ Adding device from "Discover" list
If device configured correctly in previous section, it should appear in the "Discover" list.
- Navigate to "Hardware" -> "Devices" tab.

- Click "Discover" button.

- Select device from the list and click "Select":
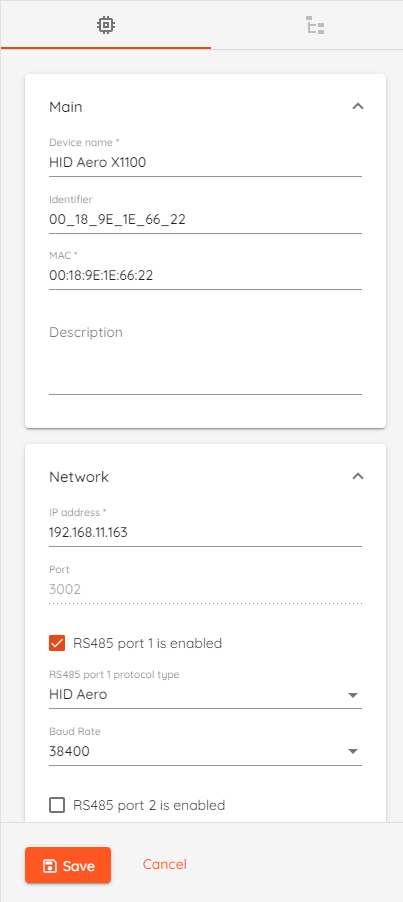
- Device Name: Type unique name for device.
- Identifier: Device identifier, generated by CredoID
- MAC: Device MAC address.
- IP Address: IP address for of the device.
- Port: 3002
- RS-485 Port 1/2 Is Enabled: Enable RS-485 communication ports for modules connection.
- RS485 port protocol type:
- HID Aero: Communication protocol for HID Aero device modules (X100, X200, X300).
- HID VertX: Communication protocol for HID VertX device modules (V100, V200, V300).
- Baud rate:
- HID Aero baud rate can be set using DIP switches
- HID VertX default baud rate 38400
Only one communication protocol type supported per port.
- Click "Save" button.
After saving the device, device status should change to "Online" after few moments.
¶ Adding device modules
This section contains information about HID device modules configuration.
- Navigate to "Hardware" -> "Devices" tab and click on configured device.
- Click Synchronize if device "Configuration" state is not "Completed"
- Click on "Devices Modules" tab.
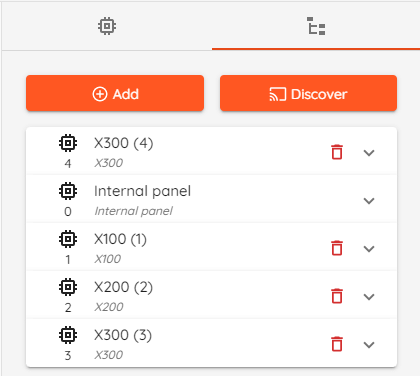
- Click "Discover" button to detect modules automatically or click "Add" button to add modules manually.
- Click "Save" button.
It is recommended to always add modules by using "Discover" button.