¶ Mercury Configuration
In this section will cover how to configure Mercury devices and use it with CredoID.
¶ Connecting to device
-
Connect an ethernet cable to the device and enable factory default settings, by turning DIP switch 2 to ON. This will enable factory default communication parameters.
- Network: Static IP address: 192.168.0.251
- Subnet Mask: 255.255.0.0
- Default Gateway: 192.168.0.1
- DNS Server: 192.168.0.1
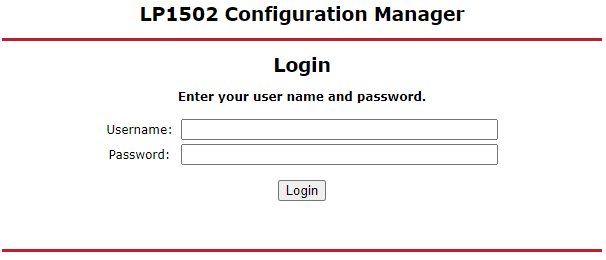
- Set DIP switch 1 to ON. This will enable default user name admin and password password.
- Open a web browser and connect to device over default IP address: http://192.168.0.251
¶ Creating a web user
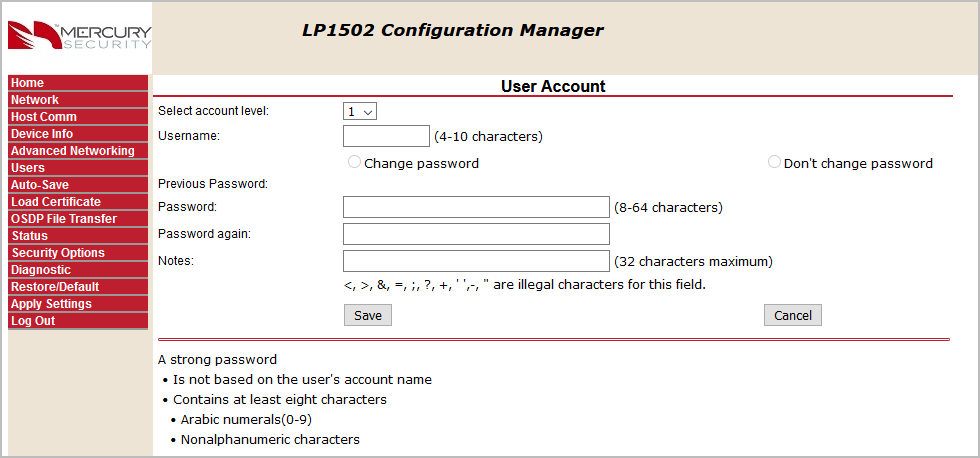
Create an optional web interface user if you want to change device settings later.
-
Navigate to "Users" tab.
-
Click "New User" button.
- Username: type name for user, don't use 'admin'
- Password: create strong password for the user
-
Click "Save" button.
¶ Configuring Network settings
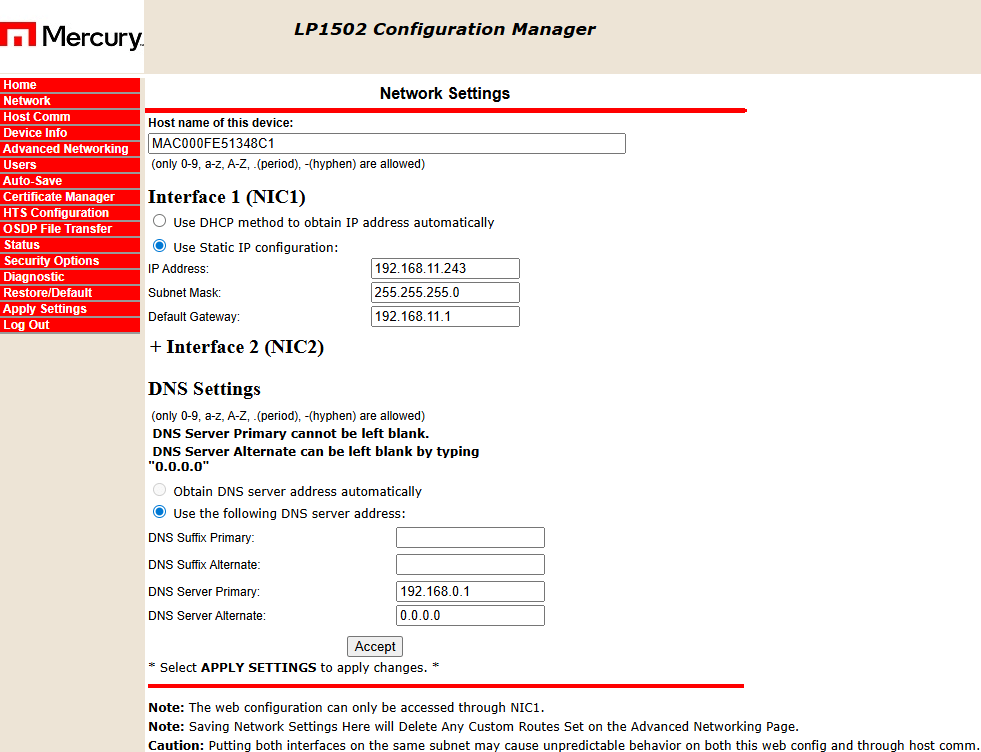
- Navigate to "Network" tab.
In the IP Settings section, configure the following:
- IP Address: Assign a static IP address to the device.
- Subnet Mask: Enter the appropriate subnet mask.
- Default Gateway: Set the gateway address for the network.
- Click "Accept".
Ensure the device is on the same subnet as the system running the CredoID service.
¶ Setting host communication
-
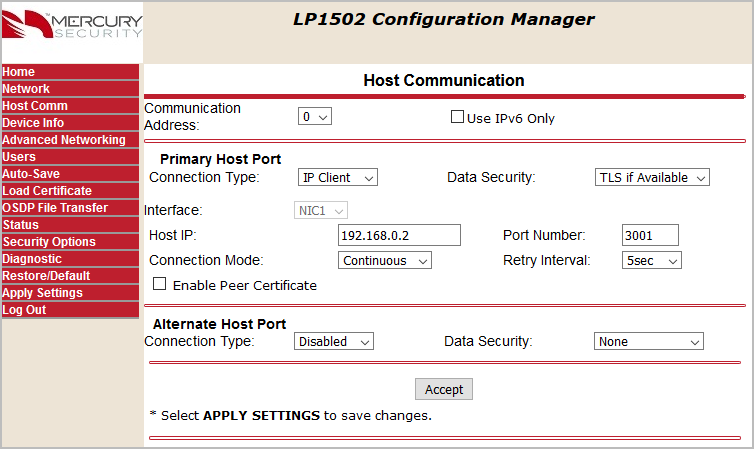
Navigate to "Host Comm" tab.
- Connection Type: IP Client.
- Data Security: TLS if Available.
- Host IP: Enter IP address where CredoID is running.
- Connection Mode: Continuous.
- Port Number: 3001.
-
Click "Accept".
¶ Applying configuration
- Set all DIP switches to OFF position.
- Click "Apply Settings" on the left menu. Device will reboot.
Now you can add device in CredoID which will appear in "Discover" list.
Make sure there is an incoming connection exception in your firewall settings for port 3001.
¶ Mercury With CredoID
This section explains how to setup device with CredoID.
¶ Adding device from "Discover" list
If device configured correctly in previous section, it should appear in the "Discover" list.
- Navigate to "Hardware" -> "Devices" tab.

- Click "Discover" button.

- Select device from the list and click "Select":
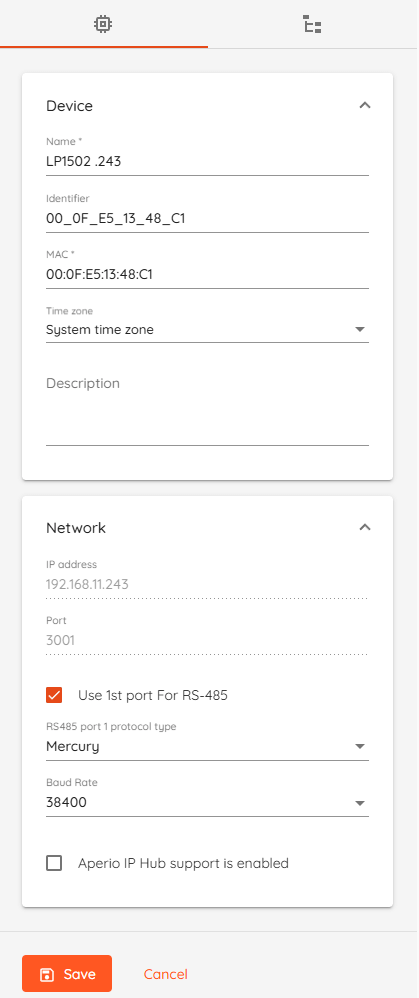
- Device Name: Type unique name for device.
- Identifier: Device identifier, generated by CredoID.
- MAC: Device MAC address.
- Time zone: Set individual device timezone.
- Description: Type device description.
- IP Address: IP address of the device.
- Port: The port number can be set in the device's web UI.
- RS485 port 1 protocol type - Select protocol type. (Only when "Use 1st port for RS485" is enabled)
- Baud rate: select baud rate for RS-485 communication with modules.
- Click "Save" button.
After saving the device, if device status should change to "Online" after few moments. - Click Synchronize button and wait until device Configuration state is "Completed"
¶ Adding device modules
This section contains information about Mercury device modules configuration.
- Navigate to "Hardware" -> "Devices" tab and click on configured device.
- Click on "Devices Modules" tab.
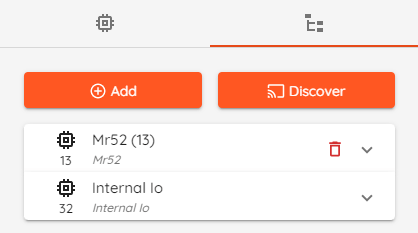
- Click "Discover" button to detect modules automatically or click "Add" button to add modules manually.
- Click "Save" button.
It is recommended to always add modules by using "Discover" button.
Starting from CredoID 4.15 downstream boards on EP2500 will work only on 2nd RS485 port and 1st port on LP2500 controller.
Some devices do not have a dedicated RS485 port but can use Reader Port 1 for RS485 communication if it is enabled in the device settings.
Readers will not function on Port 1 if the controller is configured to use that port for RS485 communication.
