¶ HID VertX EVO devices Configuration
In this section we will cover how to configure HID VertX EVO devices and use it with CredoID.
¶ Connecting to device
- Connect an ethernet cable to the device and open a web browser and connect to device over default IP address: http://169.254.242.121
- To login first time - enter user name admin and leave password field blank.
¶ Setting host communication
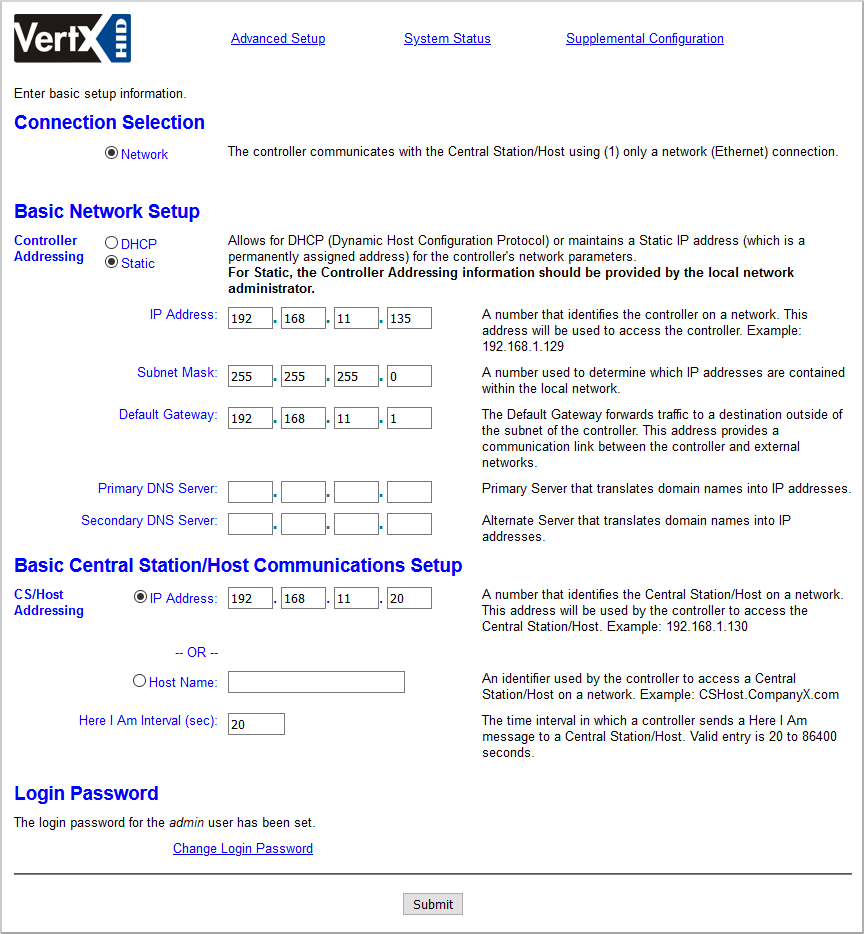
- At "Basic Central Station/Host Communicaitions Setup" select one of following options:
- IP Address: enter IP address where CredoID is running.
- Host Name: enter network name of the machine, where CredoID is running.
- Click "Submit".
Now you can add device in CredoID which will appear in "Discover" list.
Make sure there is an incoming connection exception in your firewall settings for ports 4050, 4070.
¶ Updating modules
To update modules that are connected to an HID VertX device:
- Login to controllers web UI.
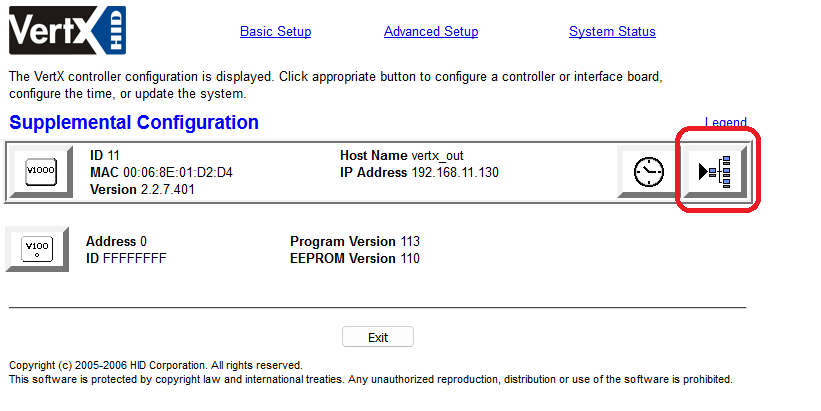
- Click "Supplemental Configuration".

- Click on the "Update system" icon as shown in screenshot below.
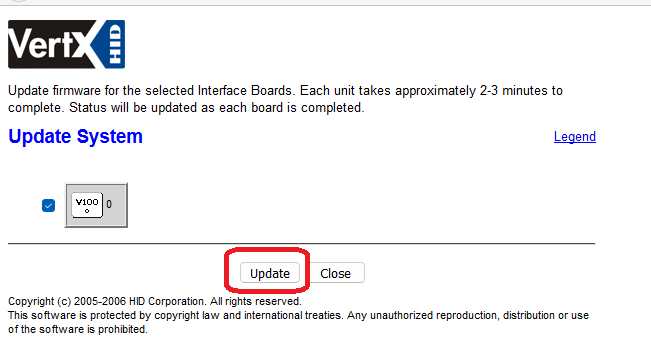
- Click update.
¶ HID VertX EVO With CredoID
This section explains how to setup device with CredoID.
¶ Adding device from "Discover" list
If device configured correctly in previous section, it should appear in the "Discover" list.
- Navigate to "Hardware" -> "Devices" tab.

- Click "Discover" button.

- Select device from the list and click "Select":
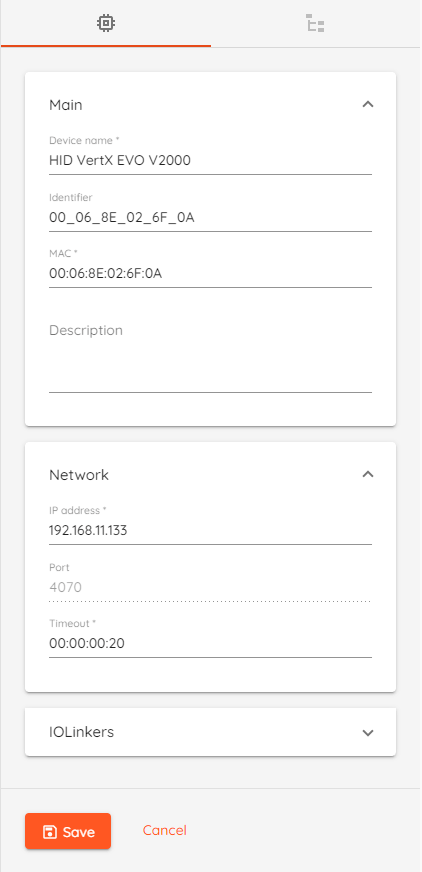
- Device Name: type unique name for device.
- Identifier: device identifier, generated by CredoID
- MAC: device MAC address.
- IP Address: IP address for of the device.
- Port: 4070
- Timeout: device Here I am interval which sets timeout after which device is considered offline.
- IOlinkers (optional): defines rules which link output action or event messages to a Boolean expression composed of physical, schedule, or logical inputs.
- Click "Save" button.
After saving the device, device status should change to "Online" after few moments. - Click Synchronize button and wait until device Configuration state is "Completed"
¶ Adding device modules
This section contains information about HID device modules configuration with HID VertX EVO V1000 controller.
- Navigate to "Hardware" -> "Devices" tab and click on configured device.
- Click on "Devices Modules" tab.
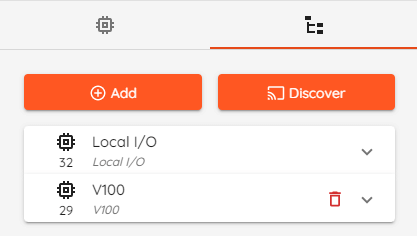
- Click "Discover" button to detect modules automatically or click "Add" button to add modules manually.
- Click "Save" button.
It is recommended to always add modules by using "Discover" button.