¶ Digifort Configuration
This section covers Digifort configuration with CredoID. Digifort server already needs to be running in order to use it with CredoID. For Digifort installation follow Digifort instructions.
¶ Adding the device
- Navigate to "Hardware" -> "Devices" tab.

- Click "Add" button.
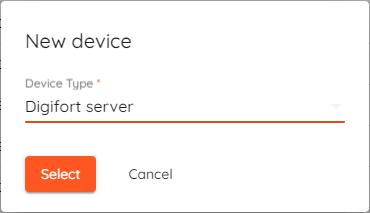
- Select "Digifort server"from the list and click "Select".
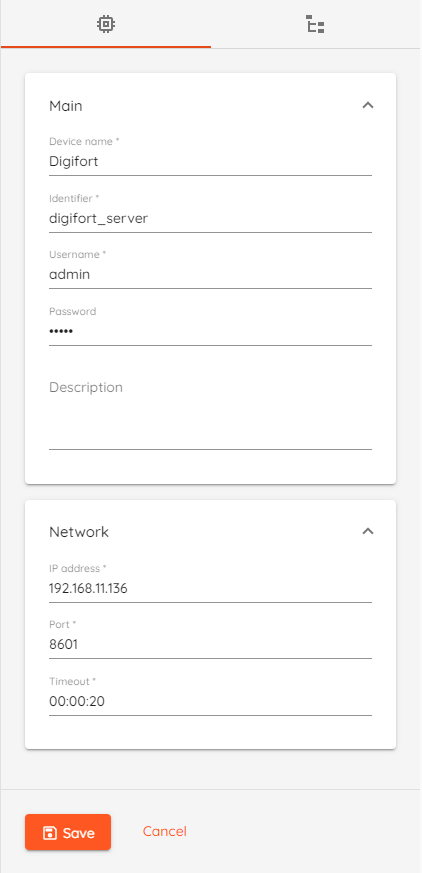
- Device Name: type unique name for device.
- Identifier: type identifier, which must be unique in the CredoID system.
- Username: type Digifort server username.
- Password: type Digifort server password.
- Description: type device description, field is optional.
- IP address: type server address.
- Port: default value 8601.
- Click "Save" button.
Device status should change to "Online" few moments after saving.
¶ Cameras detection
- Navigate to "Hardware" -> "Devices" tab and click on configured digifort server.
- Click on "Devices Modules" tab.
- Click "Discover" button to detect cameras.
- Click "Save" button.

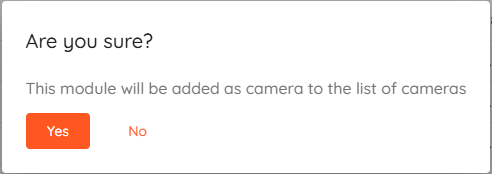
Click "+" to add cameras to list.
Confirmation dialog will pop-up, click "Yes" to add selected camera to the list of cameras.
Once added - you can check camera live stream which is available in the list of cameras.
¶ LPR Setup
For license plate recognition to work - Digifort license with additional LPR Engine license (Carmen, NeuralLabs or OpenALPR) is needed.
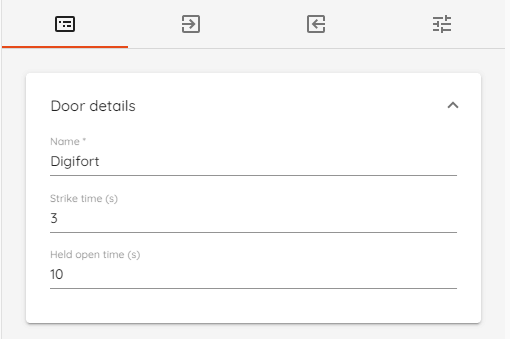
- Navigate to "Hardware" -> "Doors" and click "Add".
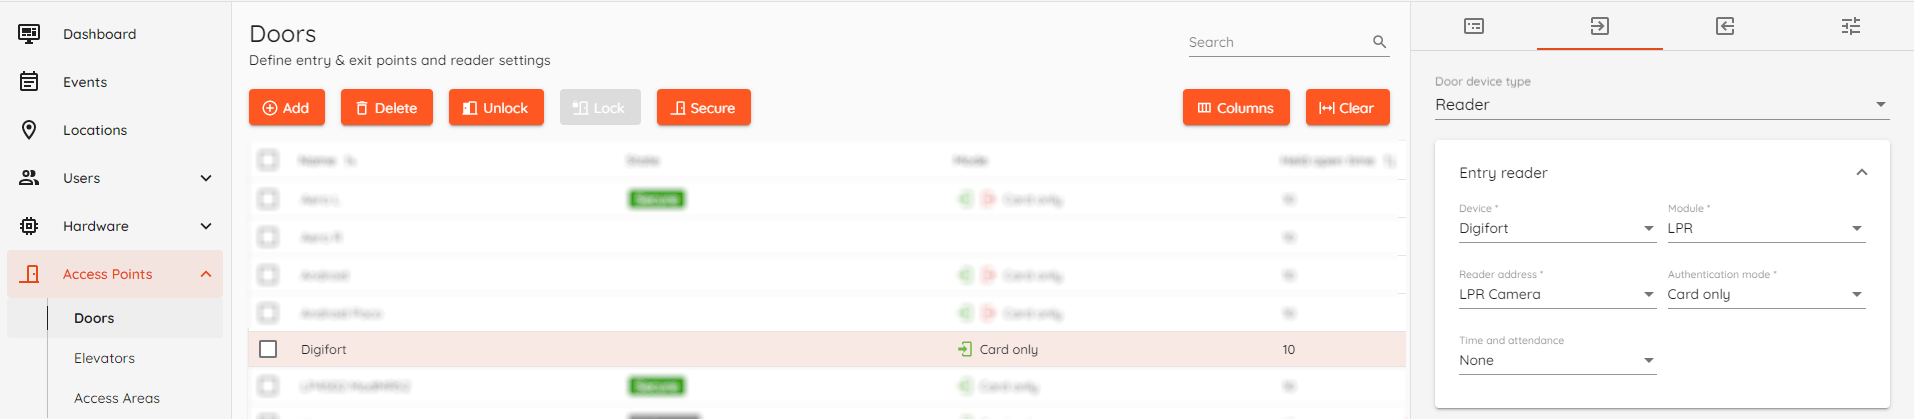
- "Door details" menu should open, enter desired name.
- Navigate to "Entry reader" settings.
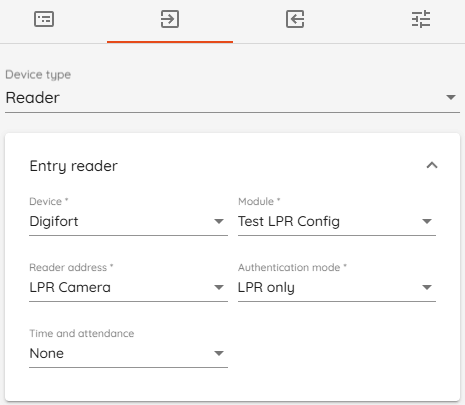
- Select "Reader" as door device type.
- Select "LPR"* as module.
- Select "LPR Camera" as reader address.
- Select "LPR only" as authentication mode.
- Click "Save".
Module name depends on your LPR configuration name in "Digifort" client.
- Navigate to "Automation" -> "Triggers" and click "Add".
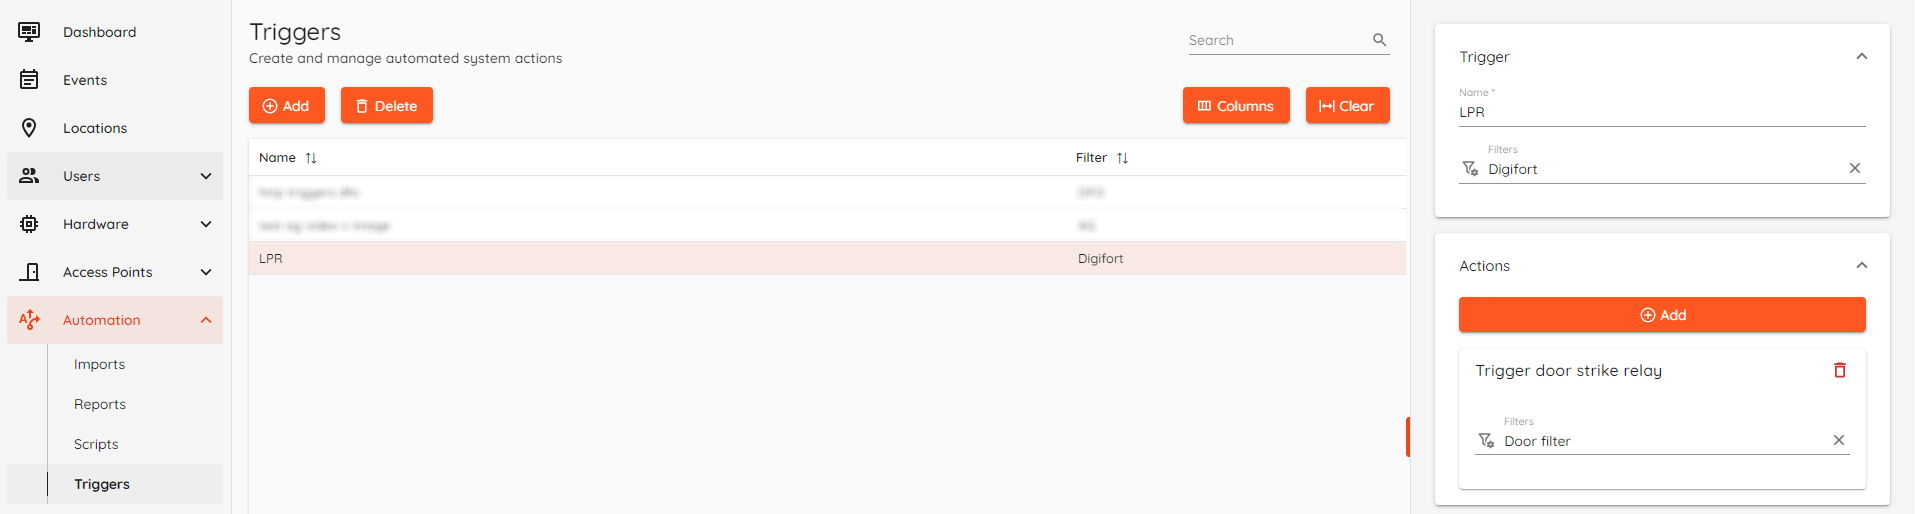
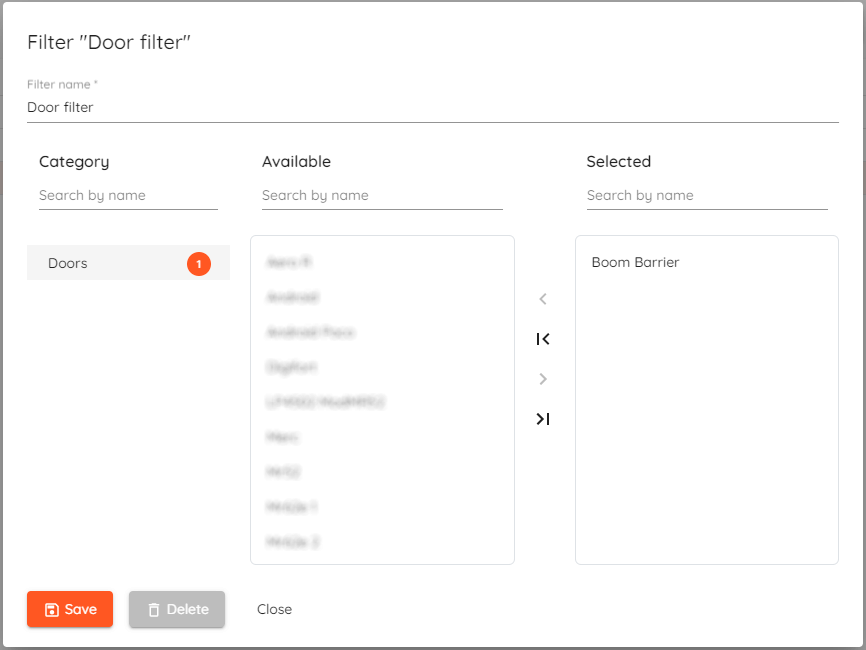
- Create a filter - select previously created "Digifort" doors from "Doors" category and "Access granted" from "Event types" category.

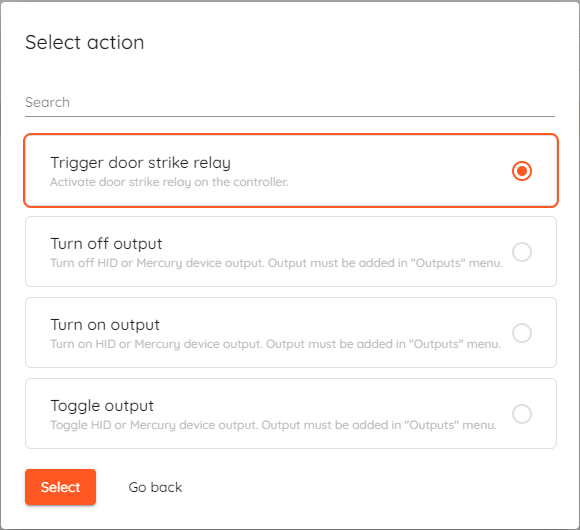
- Add triger action - select "Devices", then "Trigger door strike relay" and click "Select".
- Click "Create filter" in "Actions" section and select which "Doors" will grant access after successfull license plate recognition and click "Save".
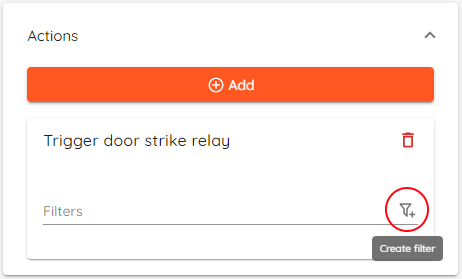
- Click "Save".
Now you can test the system, just don't forget to add license plate number to users identification set.