Axis LPR Camera
Axis FW version: 10.12.228
Axis LPR App version: 2.8-4
Setting up AXIS P1445-LE-3
- Connect to your Axis camera Web UI and open "AXIS License Plate Verifier" app.
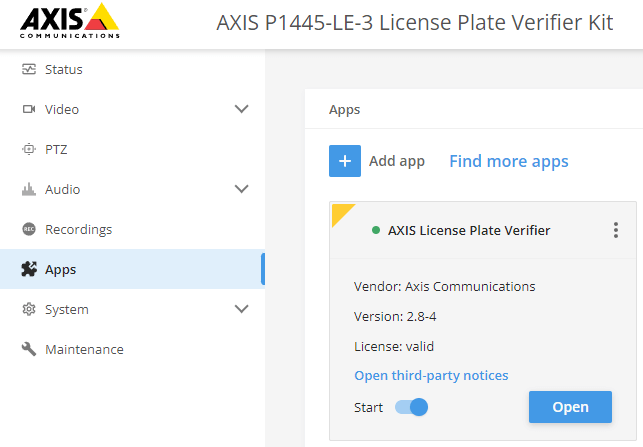
- Go to "Integration" page
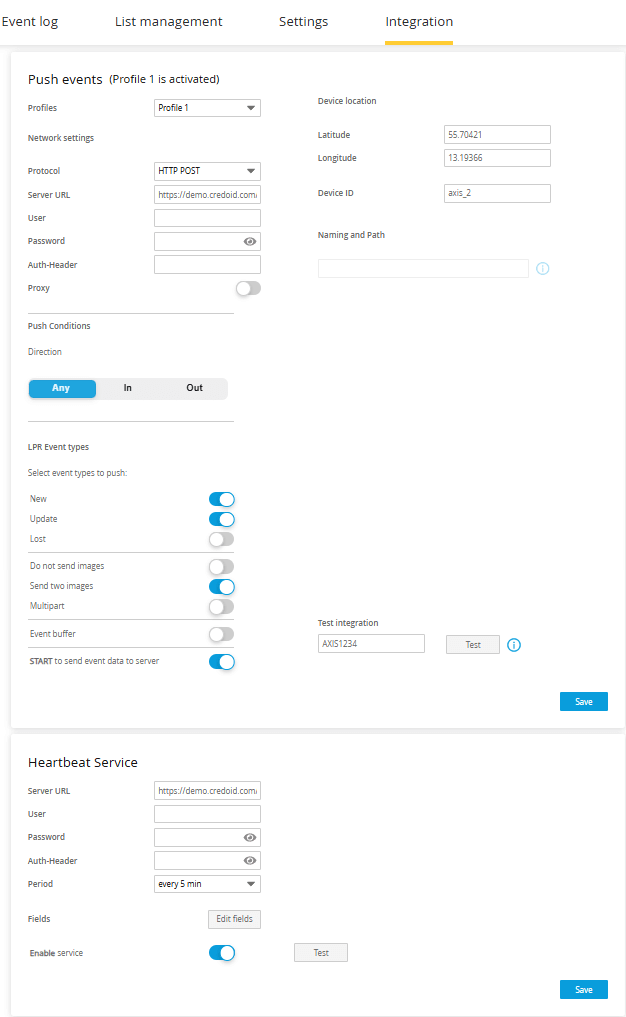
New means the first detection of a license plate.
Update is either a correction of a character on a previously detected license plate, or when a direction is detected as the plate moves and is tracked across the image.
Lost is the last tracked event of the license plate before it exits the image. It also contains the direction of the license plate.
Multipart has to be disabled.
Under push events set Server URL to:
http://``:8090/api/devices/generic-lpr-camera/receive
Under HeartBeat Service set Server URL to:
http://``:8090/api/devices/generic-lpr-camera/health
After setting IP and clicking "Test" device should be discovered by CredoID.
- Go to "CredoID":
- "Hardware -> Devices" - check discovered device list and add "Generic LPR Camera".
- "Hardware -> Cameras" - click "Add", enter name, click on "Module name", select module and click "Save".
- "Access Points -> Doors" - click "Add", enter name, go to "Entry reader" and set up as in screenshot below.
Do the same with "Exit reader".
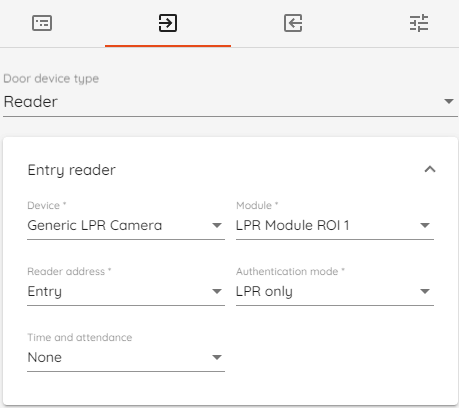
Selected "Module" will act as "Region of Interest" that's configured in Axis LPR app.
Further configuration possible through automation rules.
Trigger filter should use previously created "doors" with event type "Access Granted" or ""Access Denied" depending on the desired outcome.
Common trigger actions for LPR include attaching a camera image/video to an event or activating a door strike relay.