¶ Alerts
This section covers alert configuring process. Here you can create and set alert priorities and templates.

¶ Alert Sounds
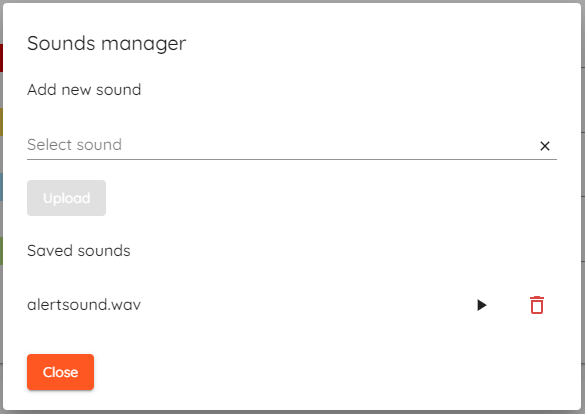
To add your own alert sounds:
- Click
 button and it will open "Sounds manager" window.

- Click on "Select sound" field, then select a sound file in opened file browser.
- Click
 button and your sound file will appear in "Saved sounds" list.
Any uploaded sound can be deleted in the "Sounds manager" window by clicking
.
¶ Alert Priorities

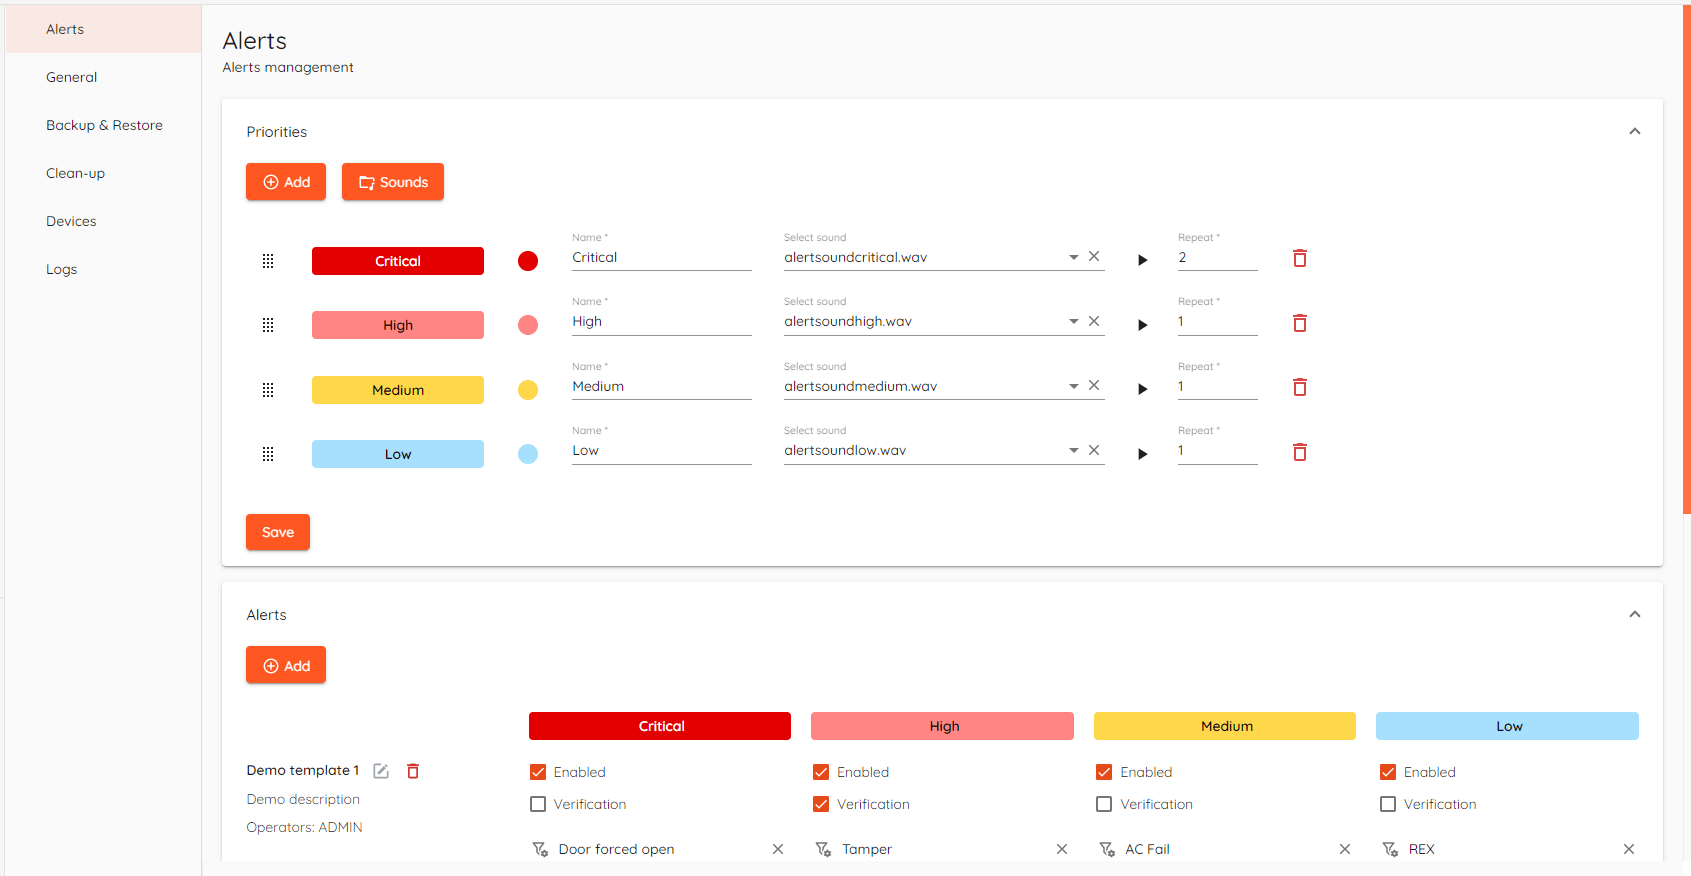
To create and set alert priorities:
- Click
 button in the priorities section.
 - Select desired color for your alert by clicking colored circle on the left side of the name field.
- Fill in the name field.
- Select a sound that will play when alert is triggered, set replay count.
- Set your priority higher/lower by clicking
 button and dragging it above/below other priorities and then click "Save".
Priorities can be deleted by clicking
on the right side of the priorities section.
¶ Alert Templates

To create alert templates:
- Click
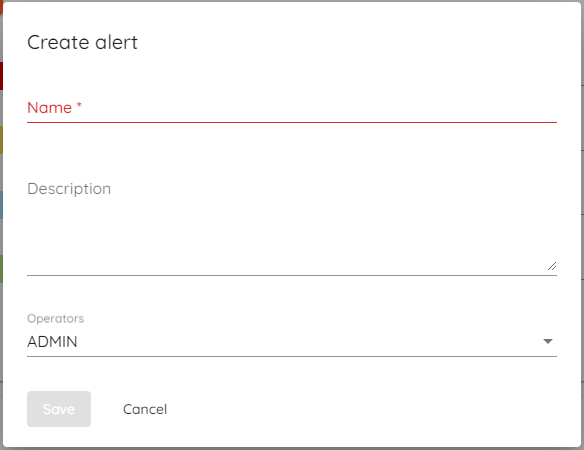
 button in the alerts section and it will open "Create alert" window.

- Enter name for your alert in the name field.
- Describe your alert template in description field (optional).
- Click on the "Operators" field and select which operators you want to assign for the template.
- Click "Save" and your template should appear in alert list.
After alert template is created you will need to select template filters, schedule and enable the alert.
To finish setting up templates:
- Click on the "Filters" field and select desired filter from the list. (How to create a filter)
- After filter is selected - schedule field should appear, click on it and select desired schedule. (How to create a schedule)
- Put a checkmark on "Enabled" button by clicking on it.
- If you want your alert to be verified by operator before he can mark it as "Acknowledged" - put a checkmark on "Verification" by clicking on it (optional).
- Click "Save" in the bottom left corner of alerts section.
Putting a checkmark on "Verification" means that the alert will have to go through "Pending" state before it can be "Acknowledged".
Any created template can be deleted by clicking
near its name.
¶ To create a filter
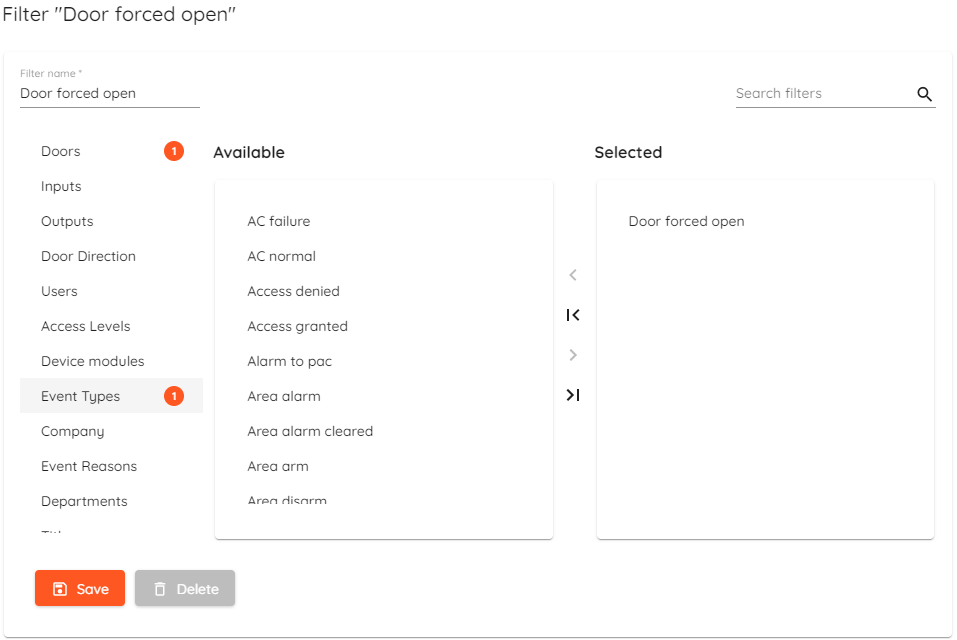
To create a new filter click "Create filter"  button which is located on the left side of "Filters" field. It will open "Create new filter" window.
If any filter is selected there will be Edit filter button available instead.
Enter filter name and then select events or entitites to act as an alert trigger, click ‘>’ to move it to Selected field and click Save.

In this example it's Door forced open event from Event types, so everytime Door foorced open event is generated it will trigger the alert.
After Filter is created it can be selected from the list.