Virtual door module
Virtual Door Module I/O control
This procedure describes how to configure doors using a virtual reader interface module and a physical input and output modules on Mercury or Aero controllers. This setup allows door status monitoring using a real input without the need for physical readers.
Configuration
- Configure and connect HID Aero controller to CredoID.
https://docs.credoid.com/hardware/devices/aero
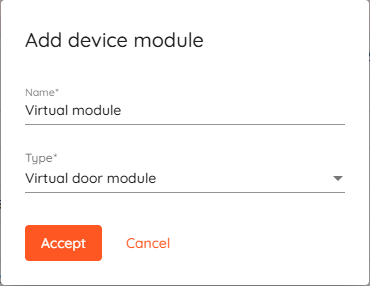
- Add Virtual door module as a virtual reader interface to Device modules. This module will serve as a logical interface for doors and associated readers.
https://docs.credoid.com/hardware/devices/aero#adding-device-modules
-
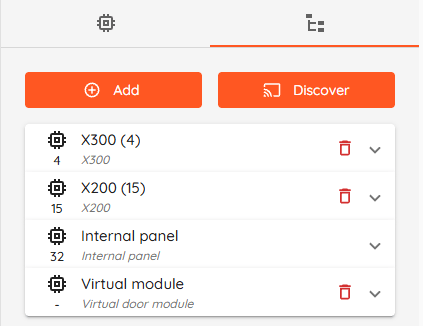
Connect a physical input module to controller. Add it using "Discover" in "Device modules" section. The module (x200) provides the inputs used for monitoring door status or other field conditions.
-
Connect a physical output module to controller. Add it using "Discover" in "Device modules" section. The module (x300) provides the outputs that are used to drive an action, such as releasing a magnetic lock, activating a door strike, or tripping an alarm dialer.
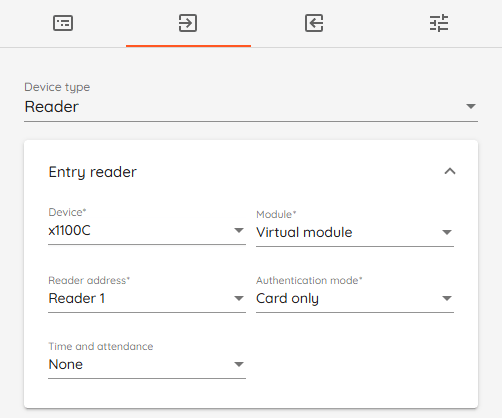
- Create doors in the system and assign an entry reader using any address of the virtual module.
https://docs.credoid.com/en/access-points/doors#creating-a-new-door
-
Configure Contact type settings and Assignable I/O parameters.
Under "Advanced Settings" section of door configuration:
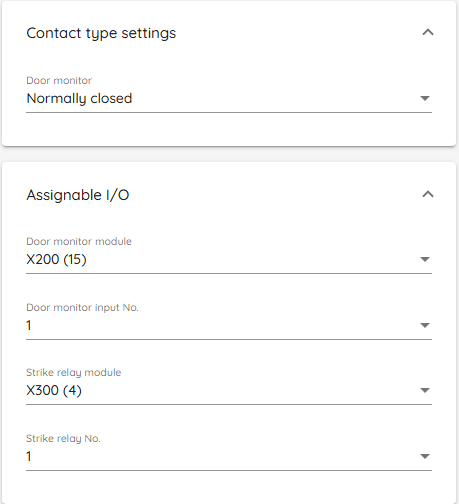
- Door monitor contact type - Depends on the lock type.
- Door monitor module - x200.
- Strike relay module - x300.
- Door monitor input No. - corresponding input number that matches the wired connection.
- Strike relay No. - corresponding relay number that matches the wired connection.
- Configure and connect Mercury controller to CredoID.
https://docs.credoid.com/hardware/devices/mercury
- Add Virtual door module as a virtual reader interface to Device modules. This module will serve as a logical interface for doors and associated readers.
https://docs.credoid.com/hardware/devices/mercury#adding-device-modules
-
Connect a physical input module to controller. Add it using "Discover" in "Device modules" section. The module (Mr16In) provides the inputs used for monitoring door status or other field conditions.
-
Connect a physical output module to controller. Add it using "Discover" in "Device modules" section. The module (Mr16Out) provides the outputs that are used to drive an action, such as releasing a magnetic lock, activating a door strike, or tripping an alarm dialer.
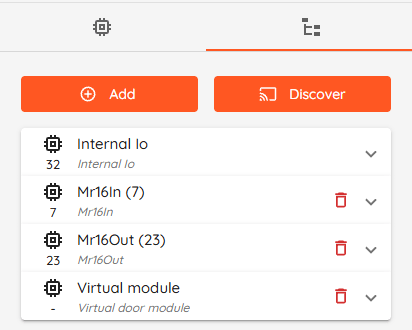
- Create doors in the system and assign an entry reader using any address of the virtual module.
https://docs.credoid.com/en/access-points/doors#creating-a-new-door
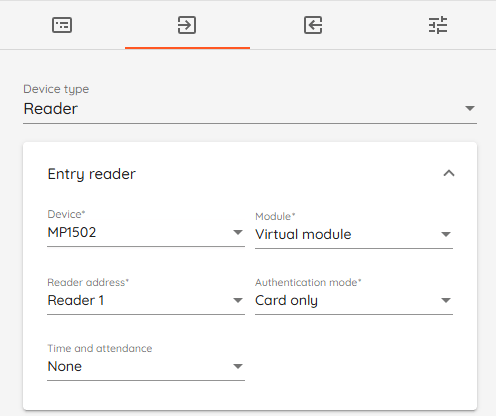
-
Configure Contact type settings and Assignable I/O parameters.
Under "Advanced Settings" section of door configuration:
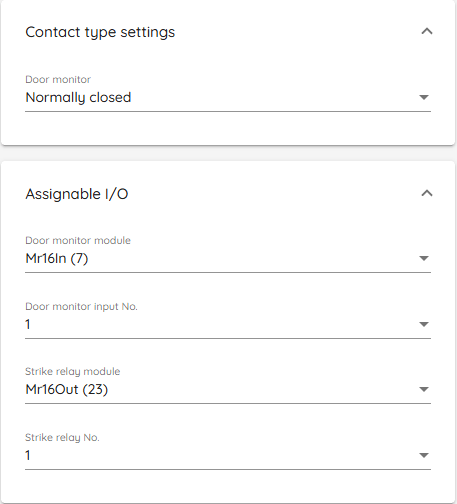
- Door monitor contact type - Depends on the lock type.
- Door monitor module - Mr16In.
- Strike relay module - Mr16Out.
- Door monitor input No. - corresponding input number that matches the wired connection.
- Strike relay No. - corresponding relay number that matches the wired connection.
Operational behavior
Configured virtual doors will operate without any physical readers. When the monitored input on the virtual module is activated - it will generate an event.
For example, when door contact is triggered - the system will generate a "Door Forced Open" event.
Using "Momentary unlock" will activate a relay (if configured) and generate "Lock open" event. After set "Strike time" - "Lock closed" event will be generated.
Triggering door contact while the lock is open - the system will generate a "Door Open" event.
To suppress "Door Forced Open" and report only "Door Held Open" events:
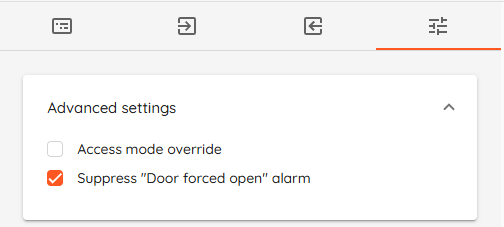
Enable "Suppress door forced open alarm" option in "Advanced settings". When this option is active, the controller will not log "Door Forced Open" events.
Access mode override
Enabling access mode override allows to set a schedule to override door access mode.
Scheduled door mode allows keeping the lobby door unlocked and open during work hours, automatically switching back to secure mode at night.
- Unlocked - Lock will be open and only door open/closed events will be generated.
- Locked - Lock will be closed, if door monitor is triggered it will generate "Door forced open" event.
"Card only" mode is currently a placeholder for "Secure" mode.
Use case examples
This configuration is commonly used for testing, simulating, or monitoring non-access-controlled doors.
Examples include:
- Simulating a door object for input/output logic testing without connecting physical readers.
- Monitoring doors where access control readers are not required.
- Generating door open/close events in the system to validate alarm routing, for event reporting, or automation logic.
By using a virtual door module and a physical Mr16In or x200 input, administrators can verify door event handling, monitor contacts, and validate system integrations without deploying full hardware door components.